How to Draw a Strawberry Easy
Is there any fruit more refreshing on a hot day than a nice juicy strawberry? Even if the answer was 'yes' for you, the strawberry would surely be in the top five!
These delicious little berries are not only refreshing, tasty and good for you but they are also beautiful visually!
People all around the world love strawberries, and their beautiful color makes a lot of people attempt to learn how to draw a strawberry. If you're one of those people, then this is the guide for you!
This step-by-step guide on how to draw a strawberry will show you how to draw one of these wonderful little fruits with ease.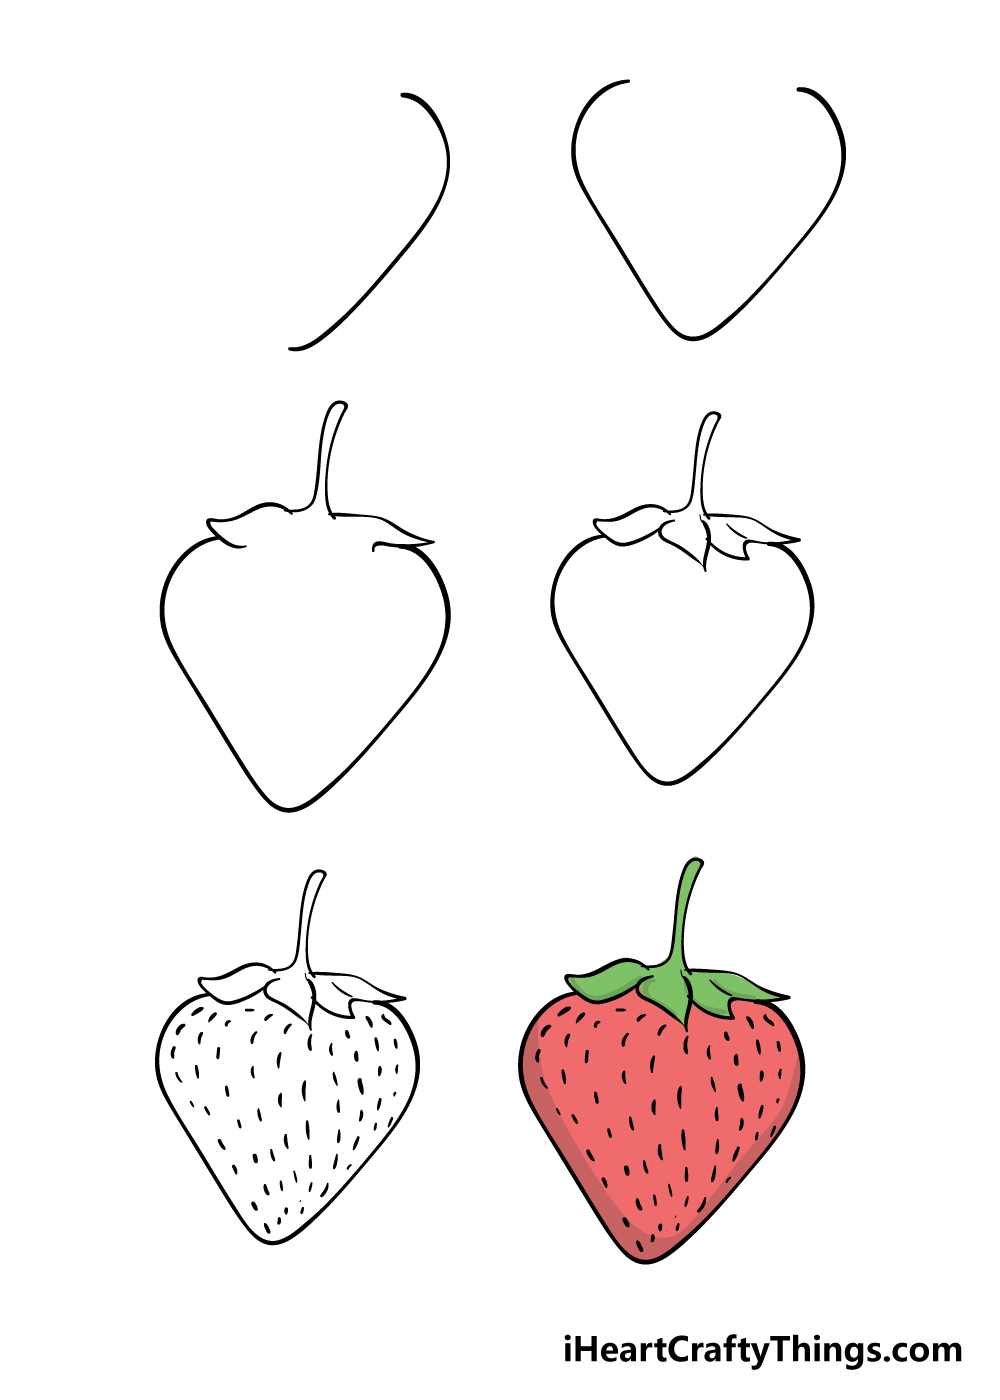
What's in this Blog Post
- How to Draw A Strawberry – Let's get Started!
- Step 1
- Step 2 – Draw the next half of the strawberry
- Step 3 – Now, draw the leaf cap of the strawberry
- Step 4 – Next, finish off the leaves
- Step 5 – Next, add all of the tiny seeds to your strawberry
- Step 6 – Finish off your strawberry drawing with some color
- 3 More tips to make your strawberry drawing easy!
- Your Strawberry Drawing is Complete!
How to Draw A Strawberry – Let's get Started!
Step 1
To start this tutorial on how to draw a strawberry, we shall start with one half of the strawberry. You can draw this with a curved line that almost looks like it could form one half of a heart shape.
We will be building on to this line in the next few steps!
Step 2 – Draw the next half of the strawberry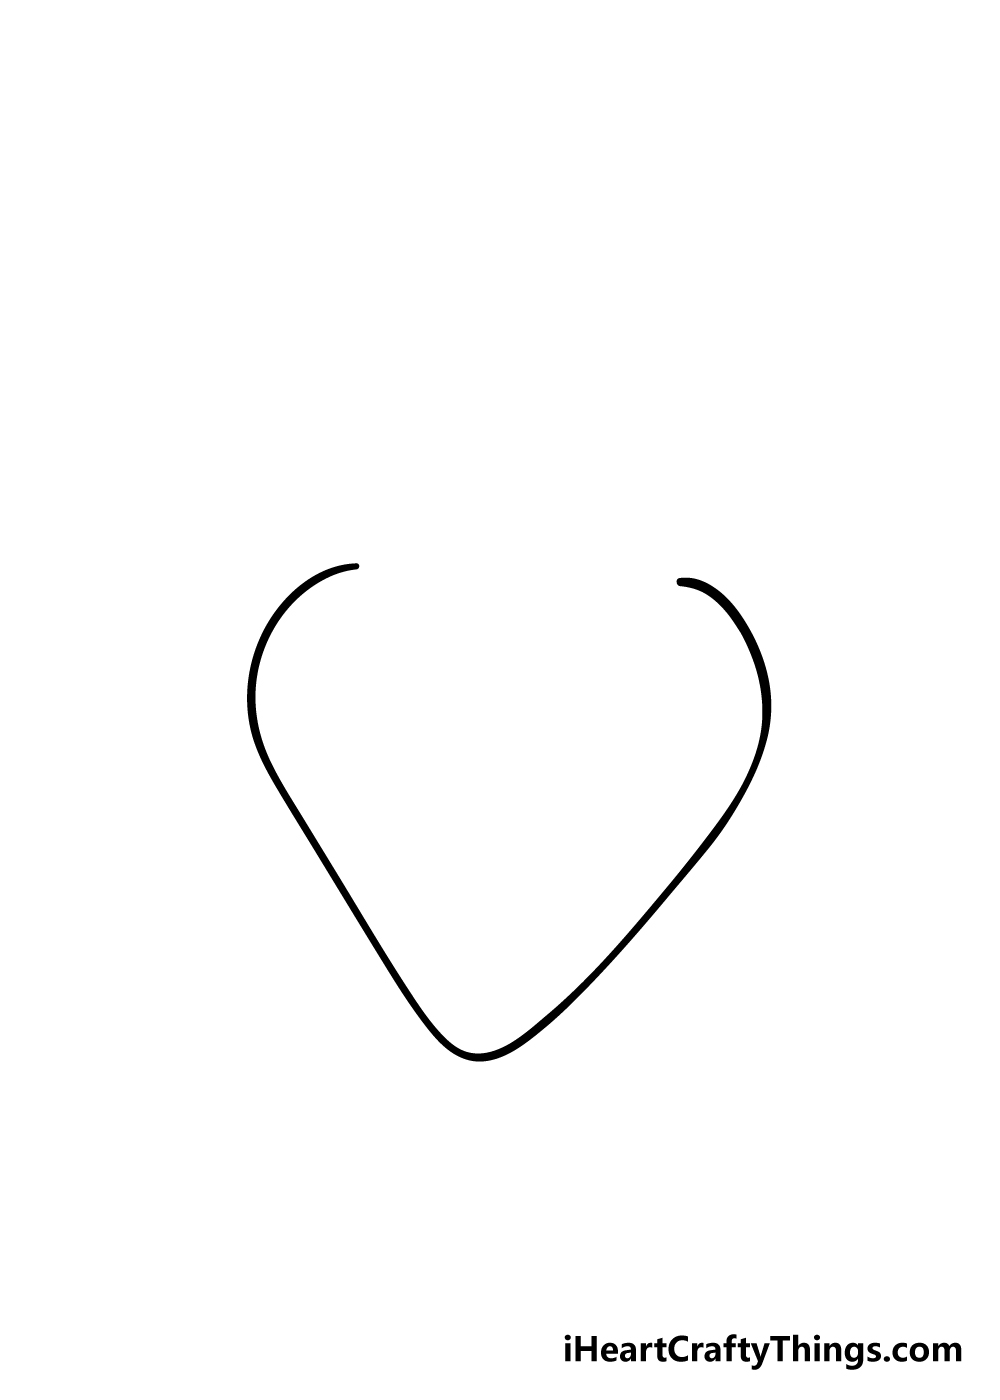
You will be mirroring the previous step of your strawberry drawing for this second step. Simply draw a curved line coming up from the base of the second one at the same angle.
Once you've finished this step, it should really be looking like a heart shape without a top. Once you have the lines looking like they do in our reference picture, you're ready to move on to the next step.
Step 3 – Now, draw the leaf cap of the strawberry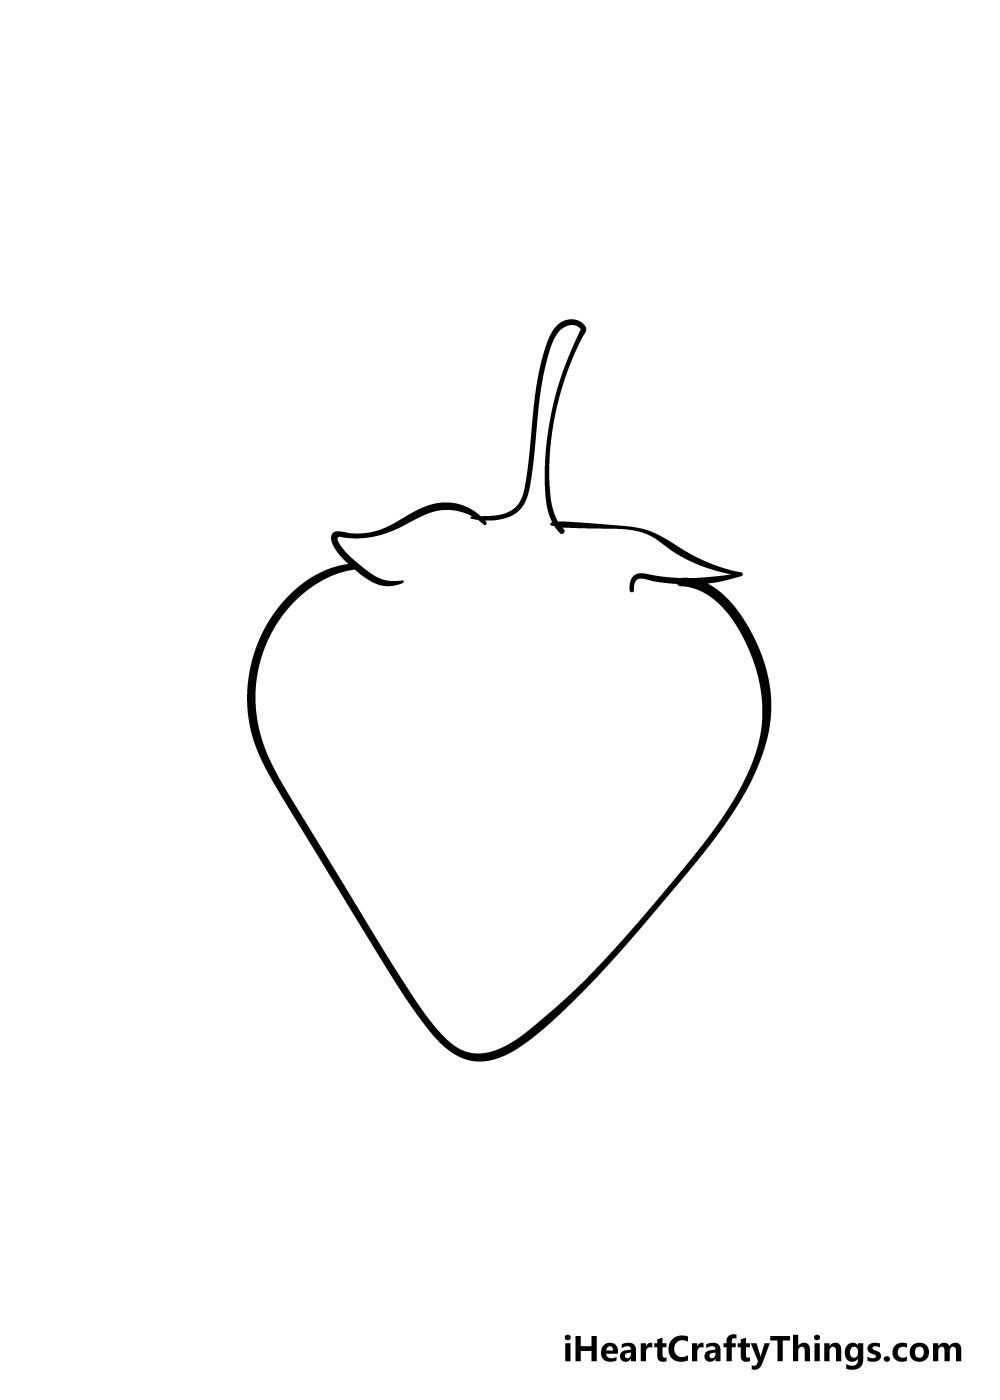
Using the space that is left at the top of the shape, we will be drawing the leafy top of the strawberry in this third step of our guide on how to draw a strawberry.
To do this, simply draw two sharp lines extending to the left and right of the strawberry's top. Then, draw a long, thin stem coming out from the very top of the leafy part.
You could change up the length or angle of this stem as well if you prefer.
Step 4 – Next, finish off the leaves
For this next part of your strawberry drawing, you can finish off the leaves on top. To do this, simply use some sharp, curved lines extending down into the interior of the strawberry.
You should draw as many of these little leaves as is necessary to fill in all of the gaps.
This is a step where you shouldn't worry about replicating the leaves in our example exactly. If you want to add more or less that's up to you!
Step 5 – Next, add all of the tiny seeds to your strawberry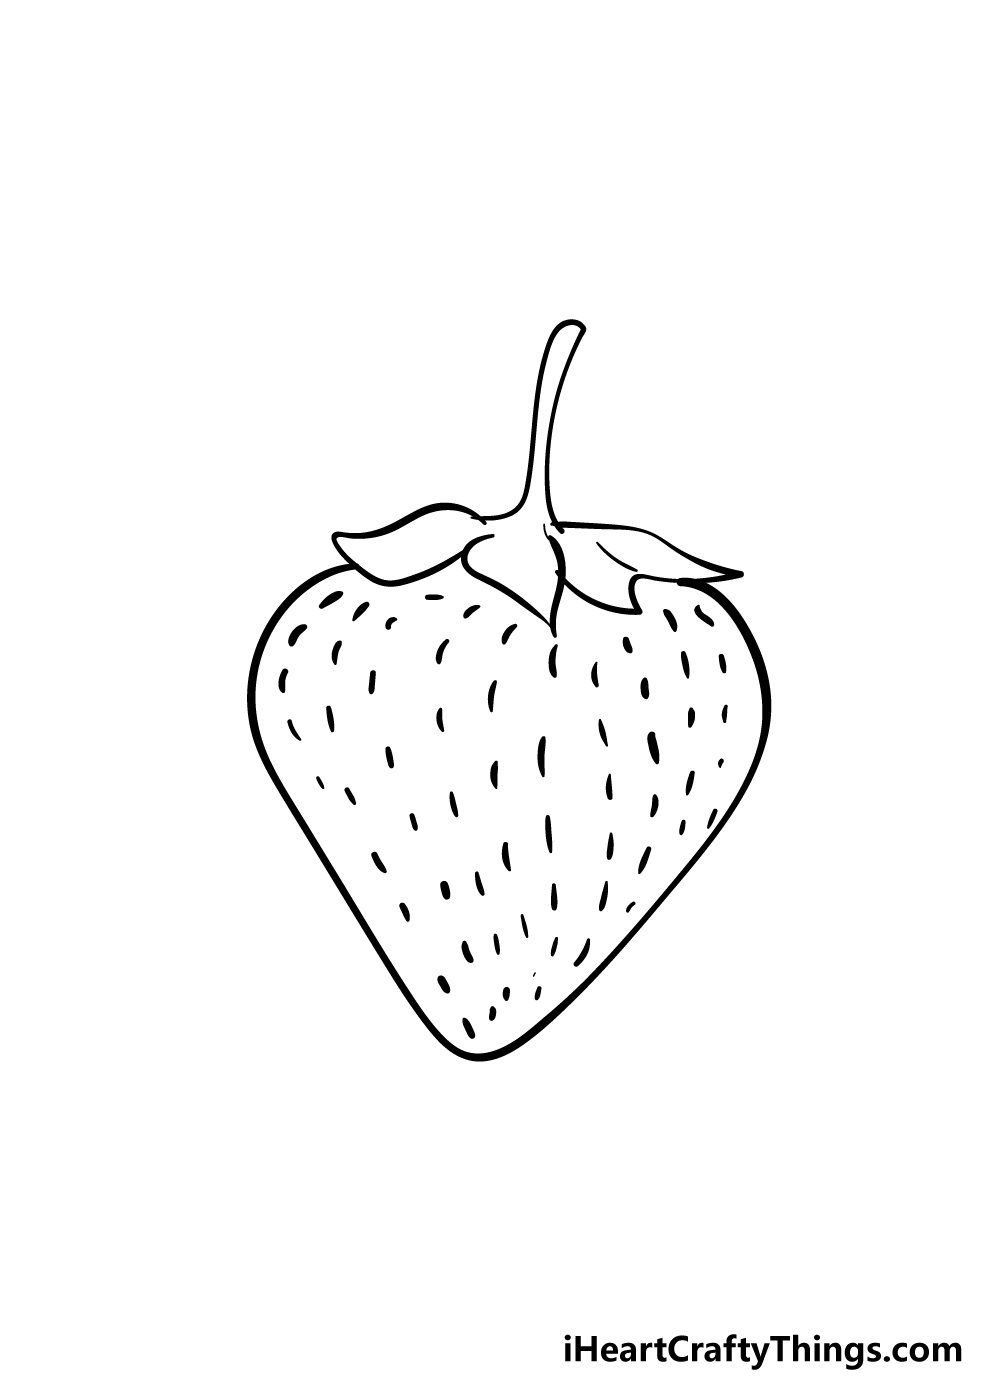
As you probably know, strawberries are covered in tiny little black seeds, so we had better add some to your picture in this step of our guide on how to draw a strawberry!
To do this, simply draw rows of small lines going down the strawberry vertically.
As you can see in the reference image, they should go down in a slightly curved line to represent the curvature of the strawberry.
Once you have the seeds drawn, you're ready for the final step! Before you begin coloring in your strawberry drawing, this is your chance to add any extra details that you think would suit your picture.
You could even draw in a few strawberries to go along with it and have them on a plate together.
If you're feeling extra creative then you could even draw some other fruits to go with it too. How do you think you will finish off this drawing?
Step 6 – Finish off your strawberry drawing with some color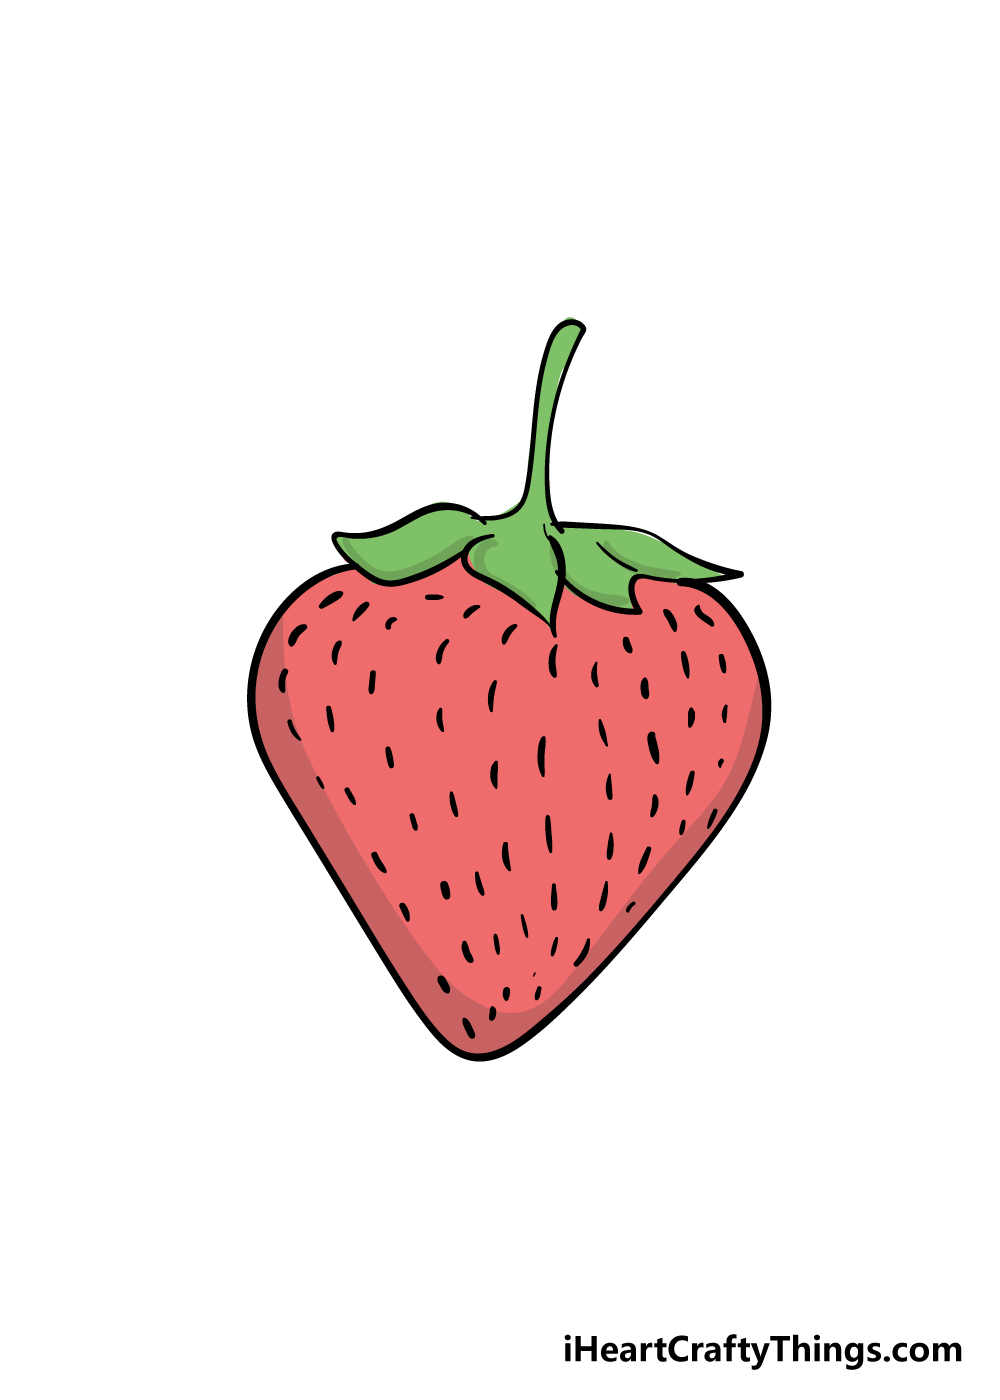
Now that you have reached the final part of your strawberry drawing, you get to have some fun coloring it in!
Strawberries have a beautiful red color scheme along with their green leaves, so if you keep it realistic then you have a great palette to work with.
However, there are ways that you could switch things up while keeping the strawberry realistic.
Some ways you could do this would be to incorporate a bit of green, yellow or even brown to the strawberry to suggest that it may be a bit ripe or not ripe enough! You could even get extra creative and draw a face onto the strawberry for a fun look!
If you don't mind sacrificing realism, then you could also use your favorite bright and beautiful colors to really make this image pop with a more stylistic look.
However you decide to color in this drawing, there's also fun to be had with the mediums that you use.
I would use some acrylic paints or colored pens for a bright, vibrant look, but a more muted tone with something like watercolors would look amazing too.
There's no limit to your creativity for this image, and we can't wait to see what you end up going with!
3 More tips to make your strawberry drawing easy!
Find out how to make your easy to draw strawberry even easier with these handy tips!
For this strawberry drawing, we specifically tried to create a simplified design that would be easy to do. While it is pretty simple, it can be simplified even further without making the design ant worse!
The first place to start if doing this would be the leaves and stalk of the strawberry.
These are probably the trickiest parts even with the simplified style, so you could make them even less detailed.
If you are struggling with any other parts of the drawing in particular, then you should definitely feel free to change them as you need.
This can make the drawing even more fun to do as it will be less frustrating!
One of the best ways that you could make this strawberry sketch even easier would be by using a real strawberry to help.
Strawberries can be purchased at most supermarkets, so you could ask an adult to get some for you.
Once you have your strawberry, you can then use it to help you alongside the steps of our guide. Doing this would also help you if you were aiming to maybe make the drawing a bit more realistic.
The best part is that when you have finished the drawing you will have a real tasty strawberry to enjoy eating!
Another way to make your strawberry drawing easy may not be so obvious when you hear it. That way would be to add some more types of fruit to the drawing.
Adding more to draw may sound like a strange way to make it easier, but you could specifically pick fruit that is easy to draw. For instance, fruits like blueberries and grapes are drawn as simple shapes, so they could be easily added.
Using these fruits, you could cover up any parts of the strawberry you just can't get the hang of. Additionally, it will only serve to make your strawberry drawing even more fun to look at!
Your Strawberry Drawing is Complete!
You have successfully made it through all six steps of this guide on how to draw a strawberry!
Noe that you have finished your drawing, you should be very proud of the beautiful strawberry that you have created.
We hope that this guide gave you the helping hand that you needed, and we also hope that it was a lot of fun for you to work on.
Now that you have mastered drawing a strawberry, you can really make it your own with some creative touches!
Whether you do this by drawing a fun background, drawing more fruits to go along with it or experiment with amazing colors and art mediums, we know you'll do an incredible job.
There are no wrong ways to complete your picture, so let your creative side take over!
We have a whole bunch of awesome step-by-step drawing guides for you to have a great time with on our website!
We cover all kinds of different subjects for many different skill levels, so there's something for everyone to enjoy!
We also upload new guides frequently, so be sure to check in often to make sure you never miss out.
Once you have completed your strawberry drawing, we would love it if you would share it on our Facebook and Pinterest pages for us to enjoy! We can't wait to see your incredible creativity on display.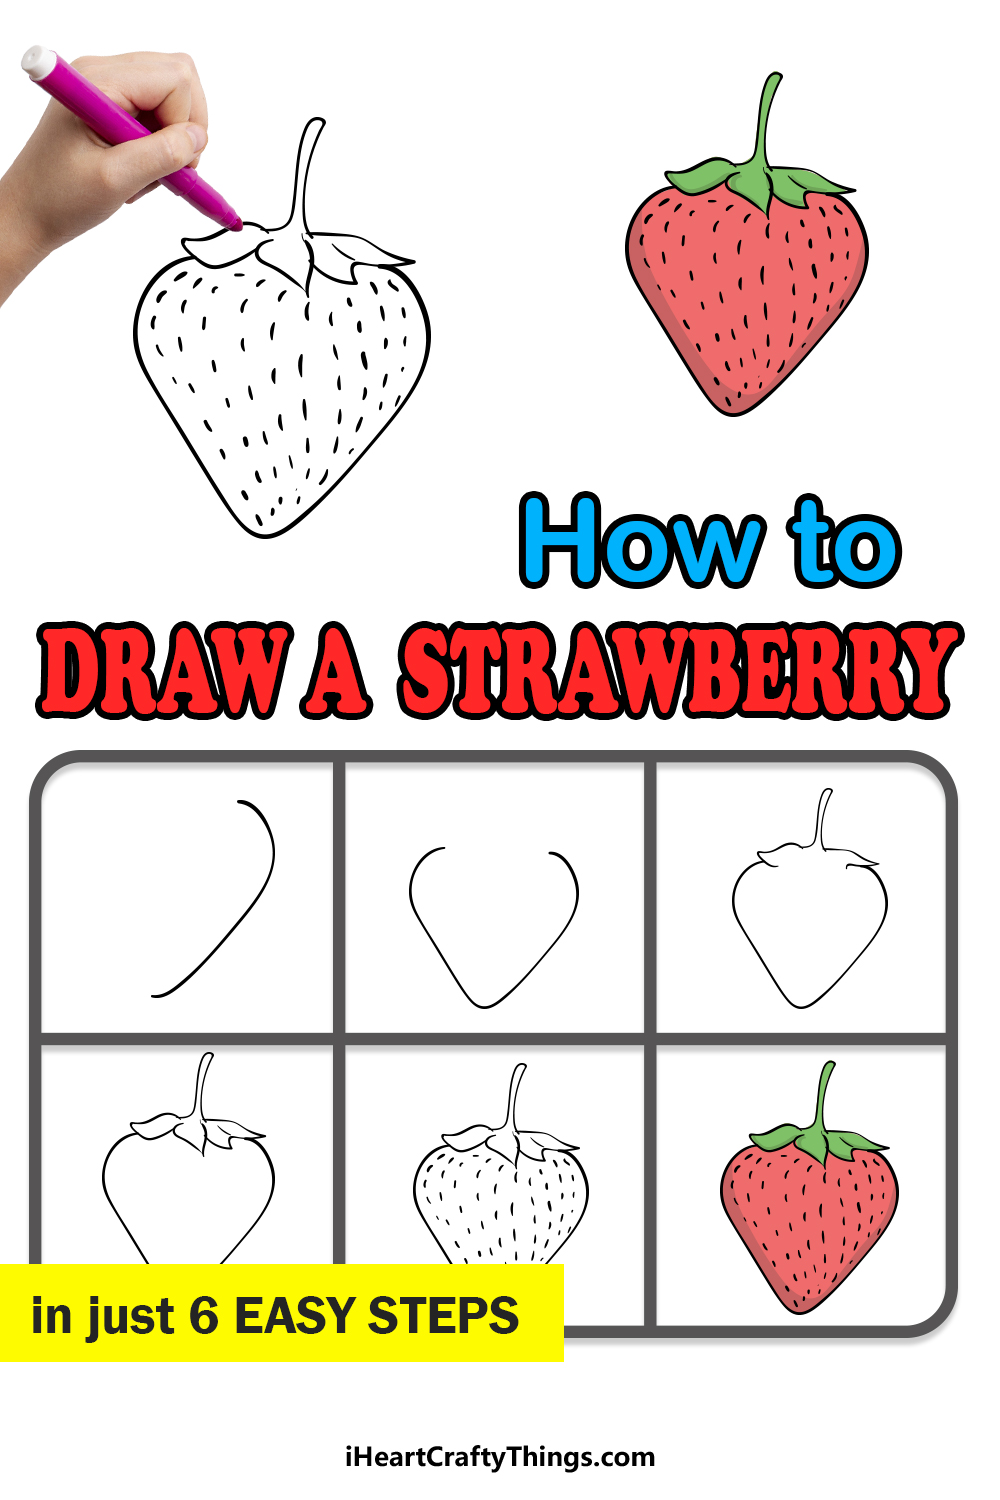
Source: https://iheartcraftythings.com/strawberry-drawing.html
0 Response to "How to Draw a Strawberry Easy"
Post a Comment